
Maîtriser l'art de la topologie 3D : Un tutoriel complet
As a 3D artist, you're no stranger to the intricate dance between vertices, and edges that is the essence of 3D modeling. Achieving the perfect balance in your 3D models often comes down to one key aspect: Topology.
In this tutorial, we'll delve deep into the world of 3D topology, exploring its importance, best practices, and how to achieve exceptional results.
So, grab your favorite 3D software, and let's embark on this topological journey.
What is topology in 3D?
Topology refers to the arrangement and connectivity of vertices, edges, and faces within a three-dimensional model. It is a critical aspect of 3D modeling and plays a significant role in determining how a model looks, deforms, and behaves during various operations, such as animation and rendering. Understanding and creating proper topology is essential for achieving realistic and aesthetically pleasing 3D models.
Why Topology Matters
It's not just about making your model look good; it's about ensuring it performs well too. Here are a few reasons why topology matters:
- Smooth Deformation: Topology plays a crucial role in how your 3D model deforms during animation. Properly distributed edges and vertices lead to natural, smooth movements.
- Efficient Rendering: Good topology reduces render times and optimizes resource usage, as well as making it easier to apply textures and materials.
- Subdivision Surfaces: For models that need to be subdivided, clean topology is a must to maintain the desired shape and avoid unwanted artefacts.
- Collaboration: If you're working in a team, clean topology ensures that your model can be easily passed on to others without causing confusion or slowdowns.
Getting Started with Topology
1. Reference and Planning
Before diving into the 3D realm, gather plenty of references for your model. Understand the structure, flow, and key details of your subject. Plan your topology in advance, deciding where edge loops will be placed.
2. Start Simple
Begin with the basics. Create the primary shapes and structures of your model using as few polygons as possible. This simplifies the process and allows you to establish the foundation of your topology.
3. Edge Loops and Flow
The magic of topology often lies in the arrangement of edge loops. These loops follow the natural contours of your model and are essential for smooth deformations. Think of them as the skeletal structure of your 3D creation.
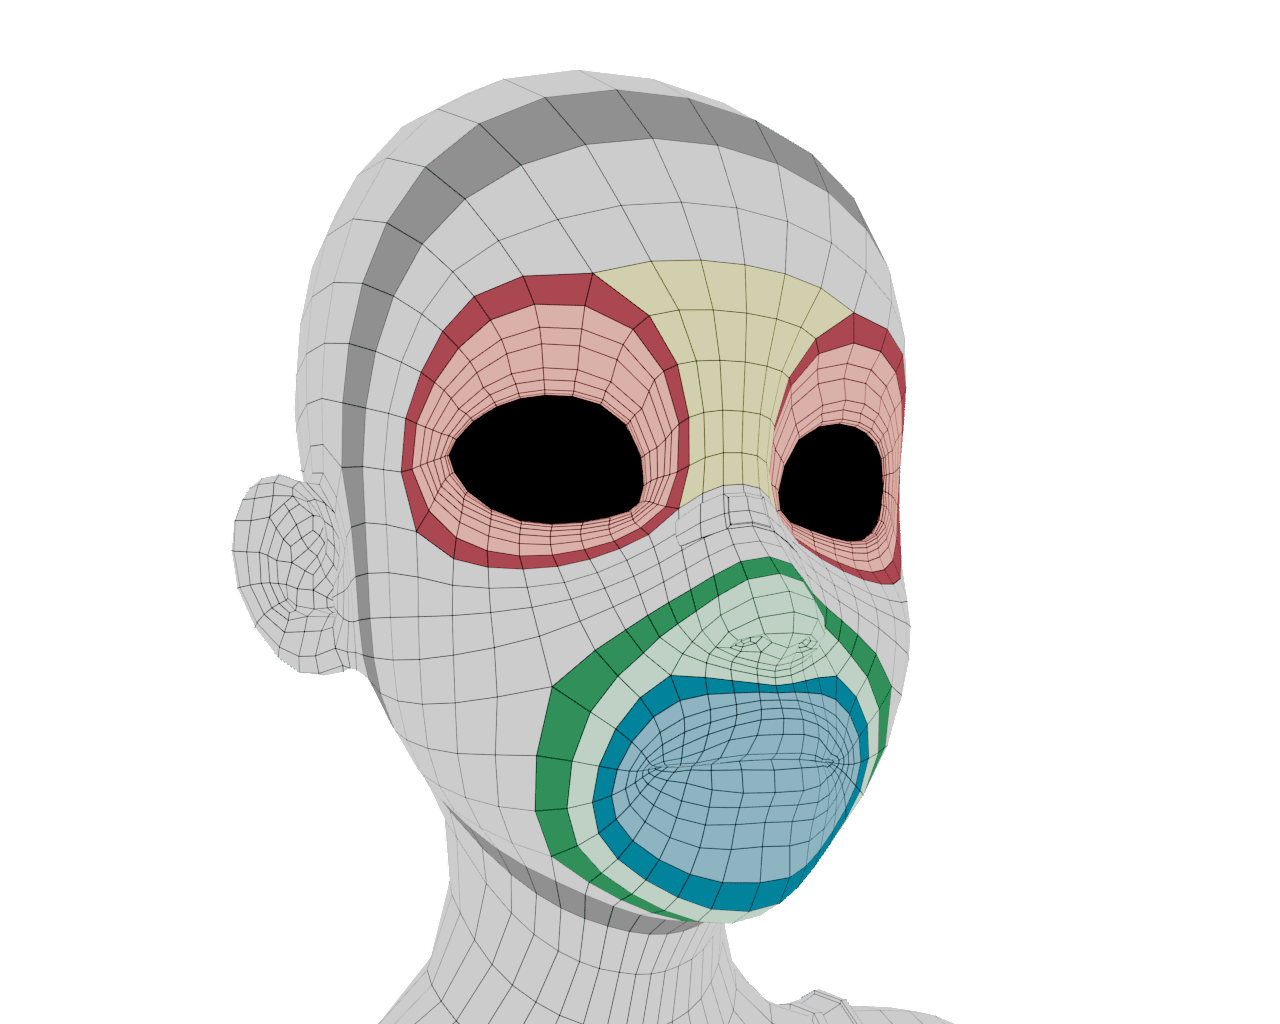
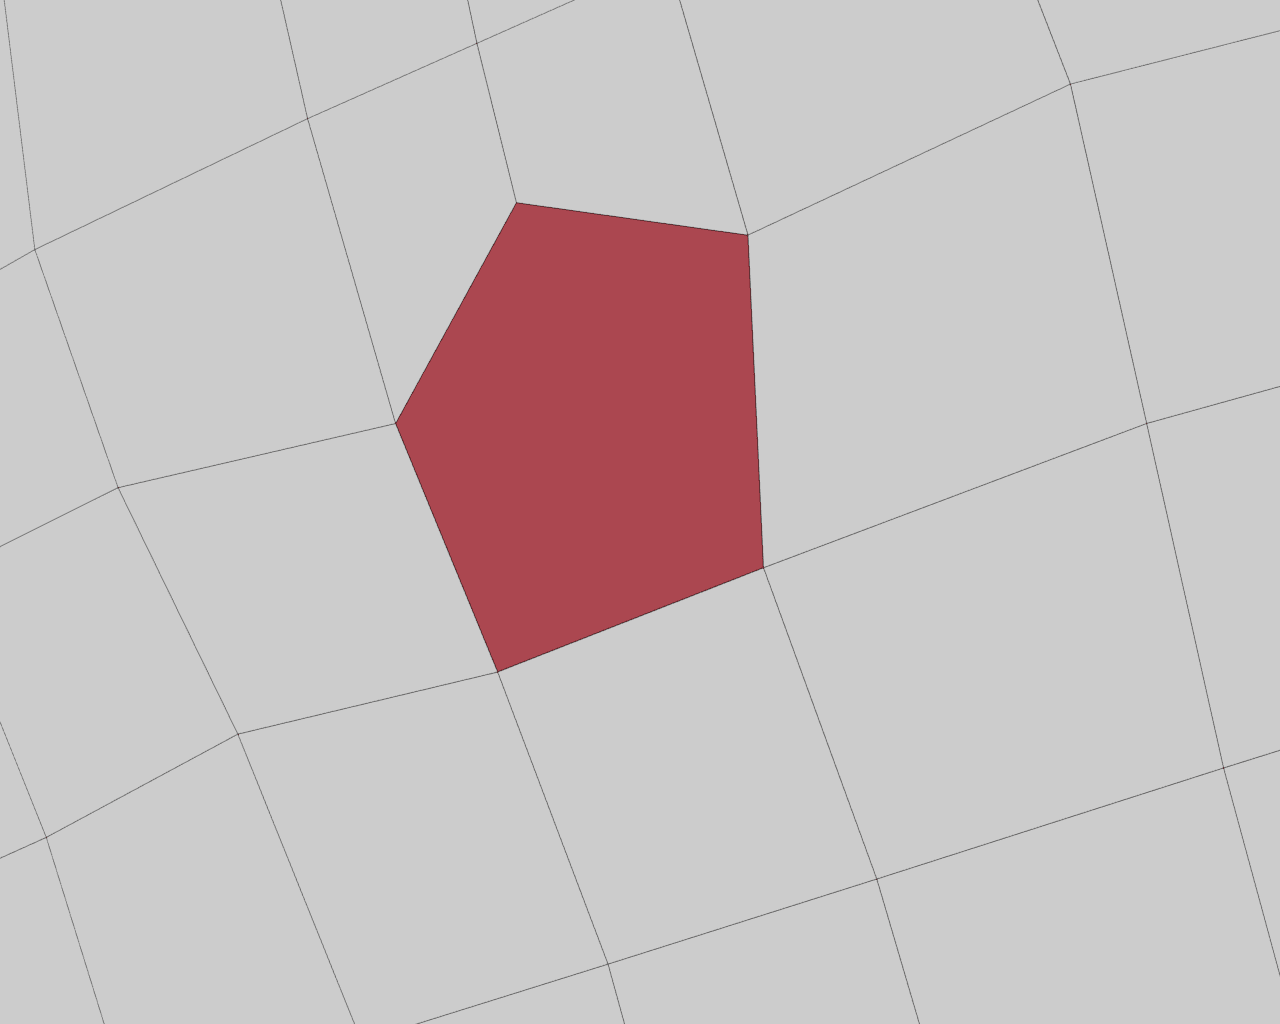
4.1. Limit Poles
Poles can cause deformations and rigidity, plan them carefully and minimize their use. Stars have to be carefully placed where intersections are happening, they will lead the different edge loops.
![]()
4.2. Delete Ngons
For some artists, it's absurd to have ngons on their models, as they cause unnecessary complications. We strongly advise you to remove them.
5. Maintain Consistency
Consistency is important. Ensure that your edge spacing and topology flow are relevant throughout your model.
This consistency contributes to even deformations and a polished final product.
Tools of the Trade
Different 3D software packages offer various tools for creating and manipulating topology. Here are some common tools you might encounter:
- Edge and Vertex Slide: These tools allow you to move edges and vertices along existing geometry while maintaining their flow.
- Loop Cut and Slide: Ideal for adding additional loops to your model, enabling finer control over the topology.
- Knife Tool: This tool lets you create new edges and vertices directly on the surface of your model, helping to refine your topology.
- Subdivision Surface Modifier: Essential for previewing how your model will look when subdivided, aiding in identifying and fixing issues.
Testing and Refining
Once you've created your topology, it's time to test it. Apply deformations, perform test renders, and ensure that everything behaves as expected. Don't hesitate to go back and refine your topology if necessary; it's a vital part of the process.
Retopology artist is a real time job in some studios to ensure that all the models are perfect for the following steps of production.
Try Polywink for Top-Notch Rigging
Now that you've mastered the art of topology, take your 3D modeling to the next level with Polywink. Our platform offers professional rigging services that will save you time and enhance your animations. Visit our website and try our services to experience the difference for yourself.
In conclusion, topology is the unsung hero of 3D modeling, ensuring that your creations not only look great but also perform flawlessly. By following the guidelines and tips in this tutorial, you'll be well on your way to becoming a topology maestro. So, embrace the beauty of clean edges and vertices, and let your 3D artistry shine!
Vocabulary
- Vertex : (or plurial Vertices) Point in 3D space used as the basis for creating edges and faces
- Edge : Line that joins two vertices and serves as the boundary between two faces
- Stars : Vertex connected to more than 4 edges
- Ngon : Polygon with 5 or more edges - Anything that is not Tri or Quad is considered as an Ngon
- Edge loop : Continuous ring of edges within a mesh - Edge loops form edge flows which form the topology of the mesh
- Edge flow : Contours of a mesh - Such as the flow from a person’s nose to down around their eye
